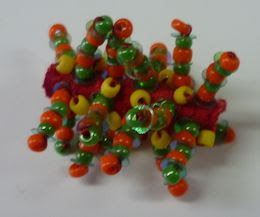
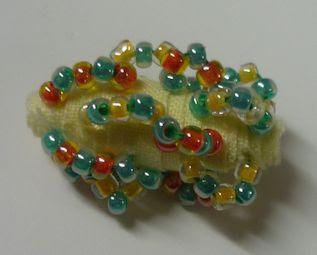
Here are a few extra fabric beads for May.
You might remember I said I was doing sets of 5 with the colours ranging from yellow through orange. I wanted to use 'salad coloured' beads. Greens - lettuce, cukes, celery, green pepper or whatever. Orange - carrots and orange peppers. Yellow - yellow peppers and possibly sweet corn. and red beads - salad colours need to have a bit of tomato or radish! (not that I use all of these things in salad!)
I had sort of wanted the fabric base range to run to red. So, day 31 has been made with red fabric base - you will see it on Sunday with the rest of this week's beads. But these are so fun to make, I decided to do a few more in red and then all of May's fabric beads will cover that range.
So here are the extras.
a
b
c
d
And here are all the May beads together.
Not so particularly 'salad' but that was the inspiration for the beads onto the warm colours yellow-red.
And the new idea for beads for June will be revealed on Sunday with the rest of this week's individual beads.
This post is linked to Nina-Marie's Off the Wall Friday.
Friday, 31 May 2013
Thursday, 30 May 2013
ALAW - week 22
Here is week 22 of the stitched flag letters for A Letter A Week.
You can read about the theme here.
Wednesday, 29 May 2013
I haven't disappeared
I have been form filling.
oh I dohate, fear, dislike form filling. Especially when the fees are stated differently on 2 of the many pages and different still on the online form.
However, plans have been hatched.
I may be able to start this one tomorrow.
oh I do
However, plans have been hatched.
I may be able to start this one tomorrow.
Monday, 27 May 2013
Postcards 10+11 and 1 for a friend
Here are postcards no. 10 + 11 for my family member. I sent off number 9 without getting a photo.
This was a fabric scrap that looked like a Victorian skyline to me. So, I worked into it a bit more with a couple markers to finish off the idea.
I have a friend who is a bit low, so I used a few more of those leftover scraps I used for no.11 and made one for her. Not sure if I will do one a week, but at least every now and then.
It is fun to make a composition out of scraps!
Sunday, 26 May 2013
"And the Bead Goes On..." 20-26 May
Friday, 24 May 2013
Lady Sew-Forth - finished
Well, Lady Sew-Forth got finished. I am pretty happy. This might be one I actually hang on the wall instead of putting away in a cupboard.
I did learn how to do the mitred straight strip binding corner I was trying to do. I am not sure I will do it again, but I got the hang of it by the 4th corner. And thanks to some curious questions by Irene, I realised that I have other options even if I haven't got the measurements right for a continuous binding. It may not be the normal choice, but I thought of some ways around it - like making up joins in the middle of the side and treating the corners as continuous. Yes, probably making my life harder, but those measuring things just don't seem to get into my head very easily.
I think a whole lot of this has to do with the fact that I never properly learned quilting, I hung out on quilt lists, looked at things other people did and found the odd bit and piece online or in magazines...and made the rest up in my head!
(Okay, but I do know how to do most of whatever you might imagine needing to know how to do about dressmaking! So, we all have our own speciality.)
I mentioned the other day that I decided Lady Sew-Forth would be a good candidate to send off for the Stretching Art exhibition. This, my friends, is not due until the end of August! So, I am too amazed with myself that I have both Swamp Dragon and Lady Sew-Forth sorted for this!
But everything happens for a reason doesn't it? I may be involved in another big project that I was approached about this week, so I am glad they are done and out of the way. I have a couple other things I want to get underway and mostly finished in the next couple weeks. and things will be well in hand to do anything else that may come up!
I am linking this to Nina-Marie's Off the Wall Friday.
Labels:
challenge,
Lady Sew-Forth,
medieval,
Off the Wall Fridays
Thursday, 23 May 2013
ALAW - week 20 and 21
Here are weeks 20 and 21 of the stitched flag letters for A Letter A Week.
You can read about the theme here.
Wednesday, 22 May 2013
Chemo Scarf made from a fat quarter
I thought I would do a little tutorial on how I did the chemo scarves. These are from a fat quarter, which leaves a very small tie at the neckline. The result of the tutorial is for a pre-adjusted scarf that can just be slipped on. You can adjust the directions to suit you.
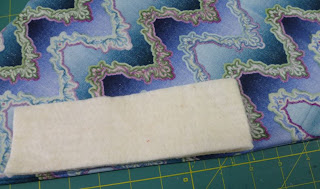
Cut wadding strip (from offcuts of quilt wadding). approximately 15-16in x 2 1/5in.
1. Take one fat quarter or cut a square from a length of fabric. Mine were approximately 20in square - a fat quarter metre. Square off the fabric - all the sides should be equal.
Fold from opposite corners to make a triangle. Press fold.
2. Fold the fabric in half on the folded edge and press a little crease to mark the centre.
3. Turn the fabric with right sides together. Fold the wadding strip in half and place the fold of the wadding against the centre crease mark.
4. Open wadding and pin in place through top layer only. Open fabric and tack stitch into place. (not pictured)
5. Fold the fabric again with right sides together. Stitch a 1/4in (or 1/2cm) seam along raw edges, leaving an opening on one side at least 4 or 5in unstitched (so you can turn it right side out.) Trim corners and point.
6. Turn the scarf right side out through the opening and poke the corners and point of triangle out.
Press, making sure the edges of the opening are turned in by the depth of the seam allowance.
Adjust the wadding so it is flat. Stitch lengthways up and down and along the short ends to hold it in place. (Scroll down to the bottom photo to see what it will look like. This keeps it from shifting around when it is washed.) When you have started sewing, remove the tacking from step 4 before you get to the point where you stitch over it.
I just feel the position of the wadding through the fabric and stitch it, but you can use your favourite marking method to make sure you know the placement.
7. Put it on your head and tie the ends at the neck. The ends will be very short, so just the first step of tying. Hold onto that and slip off - pin the knot tie so it won't shift. If you have a wig stand or hat stand, put the scarf onto it.
Adjust the scarf by tucking the point in behind the knot and tucking the sides in. Pin the point to the knot.
(If you are making the scarf from a larger square of fabric, you may be able to make a larger secure knot that you don't have to stitch in place.)
8. Use a small button and stitch through all layers. This will hold the knot and the scarf in place so it can be slipped on easily.
9. Put it back on your head and adjust the sides the way you like them. Different fabrics will behave differently, so if you didn't use quilting cotton, the fabric will drape more. It also depends on how far forward you want to wear the scarf. If the person you are making for has lost their hair, they may want it further forward than someone who has a little hair to show at the front.
Hope you find this useful. If you have a question, just ask in the comments.
As I said, you can adjust the steps if you find a way that suits you better.
Tuesday, 21 May 2013
Lady Sew-Forth - quilting
I got the quilting done on Lady Sew-Forth.
I quilted various sewing things into the borders. Reels of thread, buttons and pin cushions.
Now I am doing the binding. I am trying a mitred corner, but done with binding strips. I can do continuous binding, but have not been able to work out a way to do mitred corners when you are doing strips on the side. Or, I should say, I have worked out a way, but am not happy with it.
I found this tutorial, which seems to sound reasonable. But I found working with navy binding and navy thread this evening was far too hard to see, even with an extra light behind and a small LED light in front. I think I got there in the end on one corner. It took me a while to work out what I was actually trying to do. I am going to wait til tomorrow to do the others. Maybe they will go together better now that I understand what the fabric is doing and when I can see what I am doing!
Monday, 20 May 2013
distraught
So, this morning I woke to great noises behind the back fence.
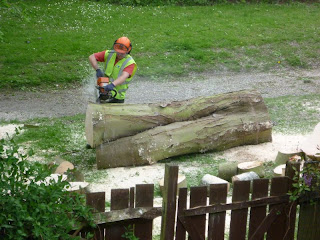
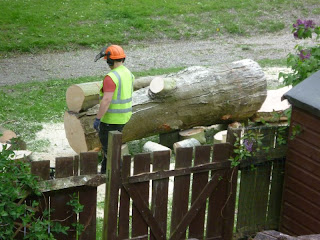
and then went through a rather fraught day watching the decimation of 'my' beloved trees.
Well, some were drastically trimmed, but the one I have been watching for years with the 3 large mistletoe balls and the recently built magpie nest...gone.
At lunchtime - I couldn't bring myself to watch when they were chopping the rest. I was trying to do my fabric bead - I think it turned out rather porcupine-y as a result.
The cherry and red maple were given a haircut so as to stop roof damage - to houses...which I can understand. But still, I was still full of anxiety that they would take them too.
I think the man who lives next to the red maple wants it taken out. If they do, please plant something else for the birds to avoid the cats!
See how big the trunk was?
I know, it was just a tree.
But it was special.
Sunday, 19 May 2013
"And the Bead Goes On..." 13-19 May
Saturday, 18 May 2013
Something on Saturday
The other week when we had a few nice days, we had a wonderful sunset reflecting from the clouds.
I found a 'sunset' setting on my camera which meant the photos came out just right!
I even managed to zoom for a 'close-up'.
Sigh, Awesome.
I found a 'sunset' setting on my camera which meant the photos came out just right!
I even managed to zoom for a 'close-up'.
Sigh, Awesome.
Friday, 17 May 2013
Lady Sew-Forth WIP
Seeing that I have been on a roll with making and finishing things... but with this week being full of bits and pieces of life...
Cast your mind back to November 2008 and Lady Sew-Forth. I made her as an exercise in proportion for one of the Fast Friday challenges. I was thinking at the time about The Bayeux Tapestry and realised that style was really playing with proportion - a king holding a church in his hand, and so on. So, decided to do it in the style of the Tapestry, incorporating bits and pieces important to me...in fact I turned the image of one of those kings in that embroidery into a version of me. Follow the link above to read about my ideas in making it.
Well she was in the pile with the not-finished Swamp Dragon...
(Looking back now, I realise that is just when my sister got sick, I went to America and while I was there, she died. So, I will let myself off for not finishing.)
anyhow... since I have decided to send the Swamp Dragon for the next Stretching Art exhibition which is called "Hi, It's Me!" (not that I am a Swamp Dragon! But that I love dragons and making them and telling their stories.) Sometimes they have a hard time getting enough work to do a good exhibition. So, I thought I should also do one that is more of an obvious self-portrait... and so, why not try to finish Lady Sew-Forth off.
So, I am. I have gone into some of the colouring of the image a bit more with my Triplus Fineliner pens. and now I am adding a border. (Who, me? This is like real quilting!) But this border is because the work as it was really needed a surround and also it is only around 15in. and the smallest the Stretching Art Work can be is 18".
So, here is a border added. Now this weekend, I will add wadding behind the whole thing (there is a thin layer behind the piece as is, but that will help it stand out.) and backing and then work on the quilting.
and next week which is not so full of life I will work on some ideas for work that might go to Festival of Quilts.
p.s. (are you tired of parenthesis yet?) HaHa!
Subscribe to:
Posts (Atom)