Thursday 28 February 2013

'And the Bead Goes on...' - Making the Beaded Badges

If you have been keeping up with the daily bead project - 'And the Bead Goes On...' you will know I am have made little badge like pieces during February.
Here are all the February beaded pieces for my daily project. Hard to photograph with the bright beads and glistening beads etc. but you will have seen them up close anyway as I did them.

February Beaded Badges
 
You can see the individual ones for week 9 up close on Sunday. I tried out some new things this week, so some aren't as tidy looking as others, but then learning new things is part of the journey!

A run down of some of the steps which go into making the majority of them. If you want to know more, do ask.

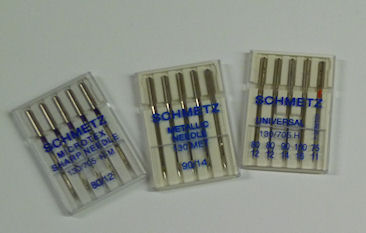
There was a small pack of playing cards in one of the Christmas crackers this year. I thought it might be fun to cover them with fabric and use them in the daily beading project. The cards are approximately 1 5/8 x 2 1/8 inches in size. I have some other little packs of cards I have saved from previous Christmasses, but this one was even a bit smaller than those.

This photo shows the pieces and a final 'badge'.

First I layered a rectangle of felt, with a bit of loft to it, between the fabric and the playing card.

Then I wrapped the fabric around the card. At first, as I mentioned a week or so ago, I stiched the flaps down on the back, but it was taking alot of extra time. So, then I used fabric glue, gluing each flap and pressing it with a hot iron between baking parchment. I used a layer of baking parchment between it and the iron because sometimes the glue oozed out. I did all of the cards for the month. This made it quicker for the daily task. However, the hardened glue sometimes interferred with being able to stitch the felt to the fabric on the back. So if I were not trying to save time, I would go back to the stitched method.

This particular fabric lent itself to think of the little coloured squares as opportunity for creating compositions. I have another fabric I may use in the future that is more of an overall pattern and will inspire different ways to embellish it.

Sometimes I used a thread which matched the bead, sometimes I used one which contrasted. Each of the badges have one thing in common besides the fabric...the larger white bead in the edge.
The beads on the edge are sewn on using a back stitch (this method can be used for pick stitch, only the stitch is much smaller. Beaded pick stitch on a zip or neckline gives a bit more elegance to a garment). You come up at the far edge of the place where you mean to stitch the bead. Then you pick up your bead or beads on your needle and go back down on the near side of where you want the bead located. When you go in, you travel along under the fabric surface and come up beyond where the next bead or set of beads will go!

And there you are! So you may ask, and some have already, what will you do with them. Well, at the moment, I am seeing them sewn down the length of ribbons. Not sure if that is what they will be, but that is what comes to mind for now.

I am going to link this post to Nina-Marie's Off the Wall Friday tomorrow when she sets it up.

Tomorrow is March! I am going back to fabric beads for March. You can see the first 2 on Sunday.
31 beads seems a lot, but not if you are talking putting them onto something. We need MORE! Plenty of scope for other colours other bead types and so on! They look just like little sweets and are lovely to run your hands through!

Tuesday 26 February 2013

Lining starts and stops

Started the linings for the wool skirts...while it is still being winter out there!
First the pink one


Stopped a problem for the lining on my son's jacket. He had an interview today. (YES! at last!) He had to buy a new suit due to the weightlifting shoulders and thighs. Tesco off the peg big and tall fit just fine. although he is neither big or tall. just fit!

However, this morning when he went to put it on, he discovered the lady had removed the security tag from the trousers and not the jacket. I was duly staying out of the way as requested, so I don't know how he got it off...

Anyway, the seam of the outside needed stitching up...not so bad. But the lining was rather chewed up. I think the security tag had just been shoved through badly in the first place.
No before photos, but I found there was enough ease in the length of the lining that I could take the 3cm needed from the seam allowance and a bit next to it in the area under the vent/placket. I pressed the edges in and stitch it over the chewed part so it doesn't get worse.
I am quite chuffed that I managed to match the stripes! This took me ages, but somehow these sorts of saves gives me great satisfaction. no one will see it, but 'I' know it is good.
(sorry for the photo quality. I forgot to do it while I had it here and had to sneak into his room while he and dad are watching Bond.)

Cross fingers and good wishes and prayers for a good result on the job front. He needs to have an interview from this man's boss next.

Monday 25 February 2013

just scrap stitch

Sometimes after a few intensive days, you aren't up to alot...or at least I'm not. It might be a fibromyalgia thing or just a normal life thing. I got the felt backings on the bead badges and did the daily project for today. But not much else.

Well, other than a special little wander round the garden centre and a cup of hot chocolate with the Thoughtful Man who took a day off to prune the apple and pear tree and sort out his allotment patch. (He only tells me these things, like having a day off, at about the time I begin to worry he is going to be late if he doesn't get up.) but it was a nice little date. We like to go to this garden centre where all we can really afford is the hot drinks! and we come away feeling very virtuous because we weren't even tempted to spend anything. On the odd occasion when they have special deals for 'garden club members' we get something like 3 rose bushes for what they normally charge for one.

Anyway...
I had this scrap of denim and a few scraps of fabric laying around on the side. A few weeks back, they decided they wanted to be together, so I did a little arrangement of the scraps.

So, tonight while I was moping about waiting for it to be a more reasonable time to go to bed (not 8:30!) I thought it was just the sort of thing I could do which wouldn't take a lot of thought.

So here it is.
and now to bed.

I think I will put together another something for 'just scrap stitching', ready for the next time I have no brain and a bit of time before bed.
I am sure they will be useful at some point.

Sunday 24 February 2013

'And the Bead Goes On...' 17-23 Feb

2013 - Week 8 Daily Beads

Playing about with dimensions and using some of the more glistening beads. For the first few, I used glass Mill Hill beads I have had from Crazy Quilting days. I have no idea if some of the other beads I have are glass or not, but I am not fussed about what they are made of if they suit the purpose!

no.48


no.49


no.50


no.51


no.52

Getting a bit over the top on the clusters.

no.53

Believe it or not, this is reigned in a bit.

no.54


The last 3 haven't got the felt backing yet due to all the extra activity around here. But that is allowed! Will do before the end of Feb. Probably sooner rather than later.

I may try something slightly unusual with the beads next week. It will depend on how it develops on Sunday's badge.
Nearly March!

Saturday 23 February 2013

Something on Saturday - LOTS!

Okay. Nearly past bedtime, but today was the day Jeanne Crockett came to the TVOffcuts/TVCT combined meeting. It was a great time. To start with the two of us hit it off very well. We work in similar intuitive ways...and she even admitted to being of the chop-chop sew-sew methodology of sewing! We are going to have to work out a way to meet up when we can have a longer chat!

Jeannie, as she likes to be called, had a presentation that was very well put together. She kept all of us interested even though the hall was rather cold. (I think my husband has come up with a solution for that now.) She told us the stories behind so many of the dresses. Some were done quickly, some took a lot of thought.

Jeannie also told us how she was thinking of taking some of the dress ideas and translating them to a full size dress. So, some wouldn't translate well to a dress for certain figure types, but there would be ways to take the ideas and turn them into an interesting sweater or scarf.

Afterwards people had a chance to look through the selection of about 80 she had brought. 366 dresses take up a lot of room! And of course, some made out of food were temporary.

And after we warmed up with a cup of tea and a selection of some of the cakes on offer, we had a chance to rummage through the bits and pieces Jeannie and I had brought.

and then set to making our own!

Fun things happening!
intense concentration

Here is a photo of the little dresses we made. Some were able to make 2.

Here is mine on it's own.

and to show the difference directions people could take, here is one made by one of the other ladies (She left it unintentionally, so I hope to get it to her in the week.)

Jeannie lives in Paris just now, but will be back in Baltimore in the summer. If you are looking for someone to come do a talk to your group, I would highly recommend Jeanne! Her blog 365 dresses is a great one to send your friends to and you can contact her from there.

I am linking to Off the Wall Fridays at Nina-Marie's.

Friday 22 February 2013

Journal sleeves and tidying

Tomorrow is the much awaited talk and workshop by Jeanne Crockett at the TVOffcuts meeting. I have been sorting through ribbon and lace and odds and ends to bring. Jeanne has brought a lot with her - probably enough all together, but it won't hurt to have more. It means I have sorted through some bags of broken jewellery I have picked up here and there.

I learned a new word...Bibelot. Still need to work on pronounciation, but that is what Jeanne called the little bits and bobs, found objects or what have you. I had heard it before, but this time took the time to look it up.

I picked up Jeanne/Jeannie and her husband from Heathrow yesterday. They came back here for a cuppa so we could work out what we need from here...and just to find out if we were on the same page. Then they went to the hotel. Today they were considering going off to Oxford.


So, besides sorting. I also put sleeves on 4 of my journal quilts from last year. I was asked earlier for a photo of the Blackberries Blue journal from November. It may be used for publicity for the ICHF show in early April at the Excell Centre. But they also found that the Sewing, Embroidery and Stitch show at the NEC will have room for CQ to have a stand after all, so we have been asked to 3 of one of the other journal colours too. They needed more yellow ones, so I am sending the Yellow one with Red strips from June - it was also on the recent CQ@10 book. And I am sending the Lemon journal from July and the Banana journal from August. I hope to get them in the post tomorrow.

I used some failed snowdye fabric (I think the Dylon stuff isn't too happy about working in the cold!) and cut the sleeves. 9in by 8in. Then stitched on the side edges - I did the continuous method one right after the other.

and then folded and stitched a seam. Pressed a little fold in it so they could have a bit of slack so the hanging rod/batten can be slipped in with out distorting the quilt.

and stitched them down.

They are all parcelled up and ready to go if I have a bit of time to go to the Post Offics in the morning.

Why do we put this job off? It didn't take more than an hour for all 4! Maybe because it is boring?

My black and white journals should be doing the rounds of the Grosvenor shows at present. I haven't checked the paper to see just where they are at present. Maybe the show in Scotland this weekend?

Thursday 21 February 2013

more about needles

I saw one of my friends down at the shops recently. She commented on the refashion I did earlier on the cami tops. She had a question about the kind of needle you need for sewing knits. She found her machine didn't want to stitch knit fabric easily.

To be honest, I just used a normal needle. But this wasn't something I was overly worried about. I was rescuing the t-shirts from the bin. But there are a lot of good things to know about sewing machine needles which is wise to follow when you do want your project to last.

Sewing Knits

What you need for sewing knits is a ball point needle.
several different ballpoint types of needles.
the arrow points to the words which are hard to see on that pack
The first one is for an overlocker. The others say what they are specified for. The Schmetz ones say Jersey - which is what t-shirting is, but other companies will just say ballpoint. Plain old ballpoint needles will be fine if you are just sewing t-shirt fabric or knit dress fabric. Super-stretch is for things like swimwear,ice skating and dance wear.

Why a ball point needle?
A sharps or universal needle can cut the thread and then you will get laddering or running in the seam area. A ball point needle will work like a knitting needle to push the threads apart and go between them. Or if you relate to embroidery, it is the difference between embroidery - sharp - and tapestry - ballpoint - hand sewing needles.

Links to more info.
I have a few links to places that tell you more about Machine needles and what type have been formulated for different projects. You will find out much more than I can tell you about the shape of needles and why. For instance, embroidery needles have a larger eye so there is less chance of embroidery thread shedding. Metallic needles also have a deeper channel for the metallic thread to lay in for the same reason. Microtex or Sharps needles have a very sharp point for fabrics with a close weave and for fine fabrics like silk.

Threads magazine has a helpful page with an overview of needles with photos.
There is also another know how page which illustrates the parts of a sewing machine needle and how it works in your machine.

Barnyarns in the UK has a really good page of information about needles. They like Schmetz needles.
some of the different Schmetz needles available
Schmetz puts colour on the shank/scarf of the different needles. If you use them you get used to which colour is used for what needle.
Here is a link to a pdf on the Schmetz site with descriptions and photos of their needles.

I like Schmetz, but I also like Klasse needles. Have a look at their site.
some of the different Klasse needles available
Klasse puts colour on the case, but not on the needle (or I don't recall seeing any). But you can easily take different coloured permanent pens like Sharpies and put colour on yourself. Put it where you can see it, but not where it will go in and out of the fabric. Put a dot of the same colour on the case so you remember which colour goes which which type of needle!

Don't forget that like your kitchen knives, machine needles get dull. They can get burrs on them or even get slightly bent at the tip which can't be seen unless you use a magnifiying glass or the macro lens on your camera.

Sometimes you can 'hear' when it needs changed. you can hear it puncturing the fabric. or if it is toooo long you can hear it go pocka pocka! Change it! you will have more problems with your thread, your tension, snags in the fabric and more! You may think needles cost too much but it isn't a savings that is worth it in the long run.

My friend Sylvia in Italy took a photo of a new needle and and one used for about 8 hours. You can read it here.

If you think about how often they go in and out of the fabric during the time you are sewing with them...then compare to what your kitchen knives would be like if you cut through something repeatedly...well you can see why you need to replace your needle. I had one student who thought the new needle wasn't right for her machine...it was too long! But when I took a look I was shocked she even could sew with it! The metal had worn away nearly to the eye of the needle! THAT is a LOT of in and out!
Another lady had never changed her needle since she bought the machine. Something like 20 or 30 years? Yikes! and yet I have heard that story from quite a few sewing teachers.

There are a few views on the frequency.
1- use a new needle with each project and then get rid of it.
My view - Okay, it is good to start with new or nearly new, but if the project didn't involve a great deal of machine sewing, I often save it for something I am going to sew that isn't so precious. and sometimes you need to change the needle in the midst of a project if it develops a problem or if the project takes a lot of sewing.

2- replace the needle every 8-12 hours of use.
My view - this seems reasonable. Some people have a pin cushion with hour sections so they can put the needle in there between jobs and remember how much 'life' is left in it. Because I sew on all sorts of random things, I often save needles that have had a lot of use and sew on things like metal or paper with them. You wouldn't want to go back to fabric after those projects any way!

Any other views you have heard of on how often you change your sewing machine needle? My views are from my experience, but I am open to other ideas and evidence.

One more thought...
When you do machine embroidery, your needle is going in and out a lot more and faster than normal. So, keep that in mind. Sometimes you need to stop to let it cool from the heat the friction has caused. usually you need a break yourself, too...says she who forgets and then pays for the shoulder and upper back twinges.

Okay same thing - taking a break - holds true for being on the computer!
If you are still reading, I didn't expect this to be so long! But I hope it has been helpful. Leave a comment if you think there is something else I should have mentioned. Or if you have another question.

Or if you are my friend I met at the shop, hey! Leave a comment to let me know you are stopping by here now and then!

Wednesday 20 February 2013

A Letter A Week - week 7 and 8

Here is week 7 and week 8 of the stitched flag letters for A Letter A Week.


The flags are from the top 50 countries on the World Watch List listing those involved in human right violations targeting people with Christian beliefs. The flags are a reminder to Think, to Pray, and to Act where we can. My hope is that if more people are aware, there will be more chances to campaign for the chance of peace to every citizen of those countries.

Tuesday 19 February 2013

Some notes on beading

I am continuing with the daily beading, as you can see with each week's update on Sundays. Here is something I did for the first time today, although I have heard about it for sometime.

If you draw your thread through beeswax, it is meant to tame it and strengthen it. I had a go with this at one time, and just thought it was an extra bother. However, several different times in the last few years, I have read about an additional step... you press the waxed thread with a warm iron.

Well, these little badges have lots of potentional for the thread to get tangled on protruding edges or beads already sewn.

And this last week I find myself getting to the end of my pink reel of Nymo beading thread. So, it is extra curly and taking me alot of extra untangling time. (These little fabric covered card pieces are already taking me much more time than I had intended, so I probably won't revisit them for a long while once February is done.)

So I decided, let's have a go with this waxed thread lark.
Pulling it through the wax began to straighten the kinks a bit.

But look at the difference the pressed with a warm iron sections make!

I am sold!

****
Another thing to mention. If you can use needles size 10, 11 or 12, small beads will pass over the eye section easier. The needles are smaller/thinner the higher the number.
Because I am travelling between the coloured squares through the felt layer under the fabric, I like using needles that are a little longer. And I like the needles to have a little larger eye so I can actually thread the thing! Sharps needles can work, or milliners straws, but sometimes the beads catch on the eye section. Long beading needles are a bit tricky to push through the fabric glued areas on the back - they are a bit too flexible.

Anyway, I was getting on fine with a John James bead embroidery needle size 12. But when I tie off the thread on the back, I have to push through the playing card the badge is built on. Even these needles are bending a bit. I realise now they are probably best for when you are passing the thread through the beads over and over again for building a 'fabric' from the beads.

So, here is what happened in mid stitch the other day!
no, that isn't stuck through card, it is a broken needle! I have had thin needles break at the eye section before, but not often directly in half.

So, I need to look out for a few more longer size 10 or 11 needles. I usually leave them threaded up so I can just pick up the white threaded needle when I want, or the pink or the blue, etc. It means I am not threading and re-threading and losing the leftover strand somewhere.

Any new/old things you have learned from recent projects?

Monday 18 February 2013

white cami fix

So now that I have a pattern off my cami, it is time to fix it! I have been wearing it back to front because there was a stain!
I wanted to keep any fix white, so I can wear it with any other colour top. I had in mind something like a bit of ruffle, but was open to possibilities.

I dug around in my box of refashion t-shirt potential. no scraps of white. However, there was the top part of a t-shirt dress I got a Very long time ago and chopped the skirt off to do something with kids in mind - oh yeah, I think it was a t-shirt for a cow puppet. :0) Like you do.
There was a bit of the skirt still hanging in there which would give a strip of fabric.

I decided to trim out white sections to see what I was left with.
Okay, these don't look like much, but there was a bit of a petal feel about them.

So, I trimmed ends to be more petal like and arranged them in a pile over the stain...
Not too bad! The random look of the petals make it look more natural.

A few more adjustments and the addition of a button picked up from around the house. and then some judicious hidden stitching to keep the top petals from flopping too much and the button sewn to the centre and we have a flower!
Rather has a gardenia look about it, don't you think?

(oops, the button says Pierre Cardin, so it is probably from one of my son's shirts! Yikes! Okay - deep breath... If he comes with a shirt needing a button, I will hope something that posh will have a spare one in the side seam!)

And here is the new look cami top!

Bring on Spring!

Sunday 17 February 2013

'And the Bead Goes On...' 11-16 Feb

2013 - Week 7 Daily Beads

A bit of a Valentine theme this week. I really love these little tiny buttons. They have been fun to mix and match.

no. 42

no. 43


no. 44

Love this one, especially the edge.

no. 45

This one seemed to need just a bit more.
So, a white heart provided a focus.


no. 46


no. 47
 The pink beads are triangle shape. They make an interesting geometric look to the edge.

I like the dimensional stacking and looping, so I am going to do a bit more of that in the centres for next week.