
Follow the link to see what sorts of things Barbara does with her Cyanotype print processes. Here she explains some of the results and effects. You can see she is holding one of the prints on fabric.
For the demo, Barbara had prepainted papers with the cyanotype solution - a combination of 2 chemicals that react to light. When first painted on, they look yellowish. They had a slight blueish cast already because she dried them and brought them with her. In theory, you should work in a darkened room...not a dark room, but enough to see what you are doing. The fabric/paper has to be dry before being exposed to the sun. She hangs hers in an understairs cupboard for this process.
What I liked about Barbara's process was the step where she clamped the treated paper or fabric into a clip frame, or a piece of MDF with a perspex cover. I have read about cyanotype prints before and was put off by the idea of trying to keep leaves, etc from blowing away in the wind or extra bits falling onto your print or shadows caused by pins creating unwanted additions to your composition. This seems to help keep better control. It also holds the foliage close to the surface so you get a sharper image. Barbara most often works with dried pressed foliage because it is flatter and therefore sharper. It is also easier to get a similar image on subsequent prints such as the type of prints she wanted when making up cushions and bolsters for selling in boutiques.
composed samples underglass - mine is on the right

my sample is on the right

What happened in the sun was the opposite of what I thought it would do. I thought it would get more and more blue. But not so. It actually gets lighter and lighter grey.
some of the other samples being taken from the clip frame

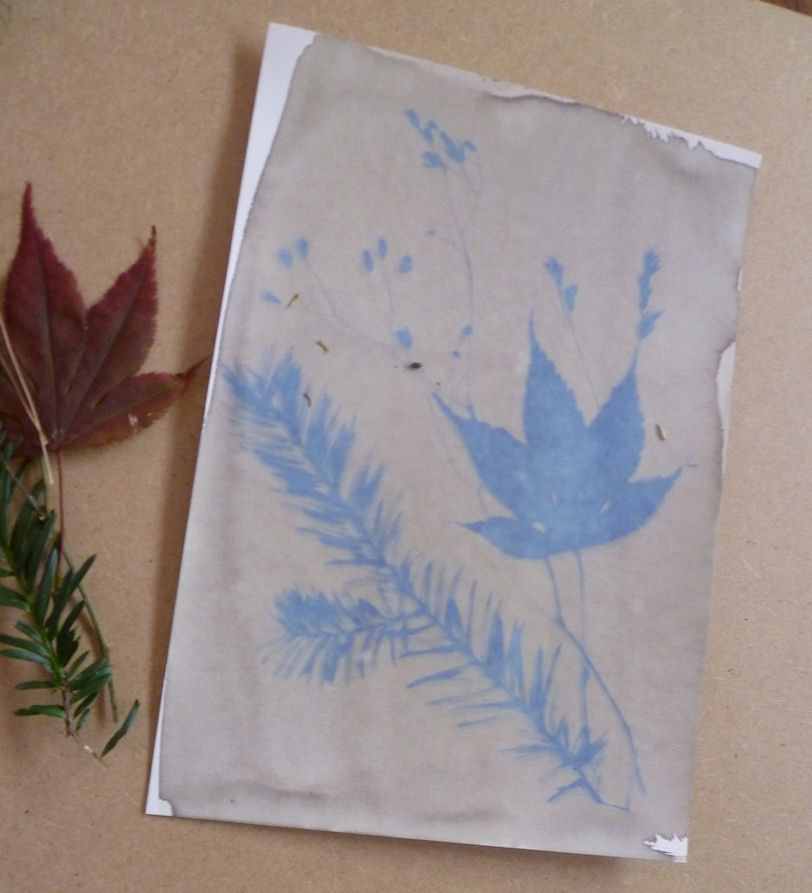
my sample out of the frame with the composition removed
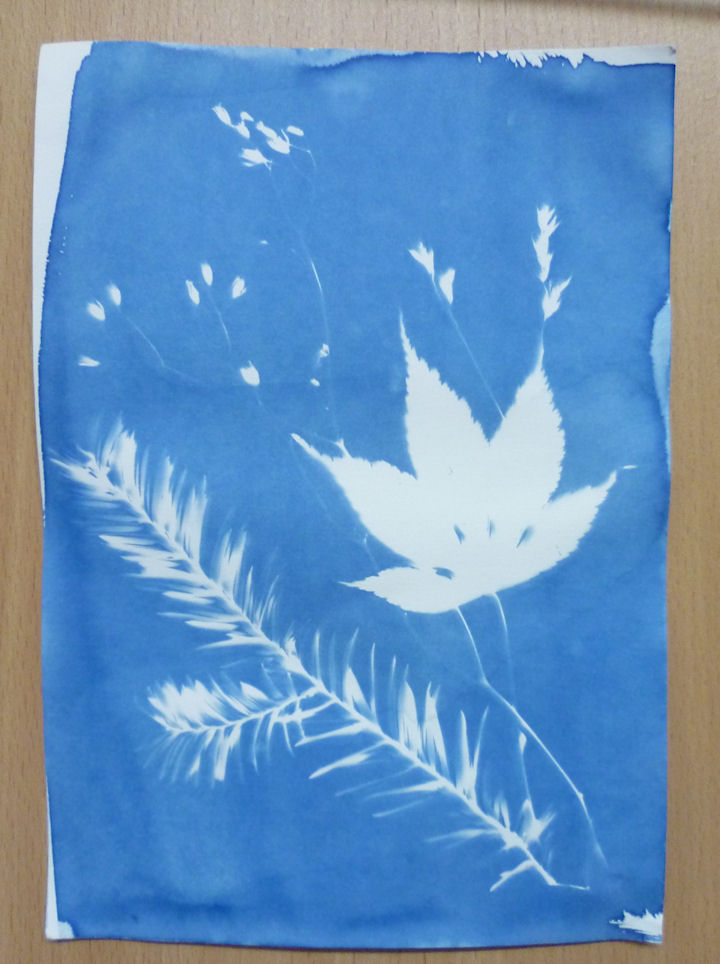
The next step is to put it into water. Soak about 15 min for the chemicals to leach out. This is where the colour change happens for the blue results.
Barbara's demo piece in the water - she used a very fine paper stencil to show us the fine detail which can be achieved.

some of the varied samples - feathers can give real detailed prints of the edges.

my piece
I am now confident to get my little kit out of the drawer and have a go! (yes, I have a kit I purchased. It was one of those things I just had to see and hear about before I was confident to do.) I have some interesting ideas to try out following on from things mentioned on the day.
Edit: I have linked this to Off the Wall Friday at Nina-Marie's.
5 comments:
That is amazing. I love sun printing.
ohhh that's neat! Another thing on my list of things to do!
Your print is much better. What an interesting technique - thank you for introducing us to it.
What fun. What good results.
Thanks for the comments. I enjoy learning new things. Especially if they are ones I can connect to my way of working.
Sandy
Post a Comment