
Some of the steps.
cut 3 lemon templates from freezer paper.

lay them in a suitable arrangement and press onto synthetic organza.
cut round template with soldering iron.


In the end, I found a scrap of thin habutai silk I had dyed, which I liked better. I could have cut it by hand, but as I had the soldering iron out, I used that. It burns through the very thin silk, but I also found there was distortion on the bias grain.

I used the same template for cutting the silk and then for cutting an off white fabric for the pith. The pith was cut with scissors. You can peel the freezer paper template away and use again several times as long as you have not pressed it with a very hot iron.

The silk had just enough colour variation to make it more realistic, but I still put one layer of the crystal yellow synthetic organza over the fused layers and then cut it back to expose the pith. It makes it very luscious and actually makes my mouth water to look at it! LOL

Next I placed batting and a layer of backing fabric under the lemon print and quilted segments into the lighter prints. I quilted round the solid lemon prints.
I took the lemon slices and worked out the position by folding the edges of the quilt sandwich under. I had another layer of fusible under the lemon slices, so fused it into place.
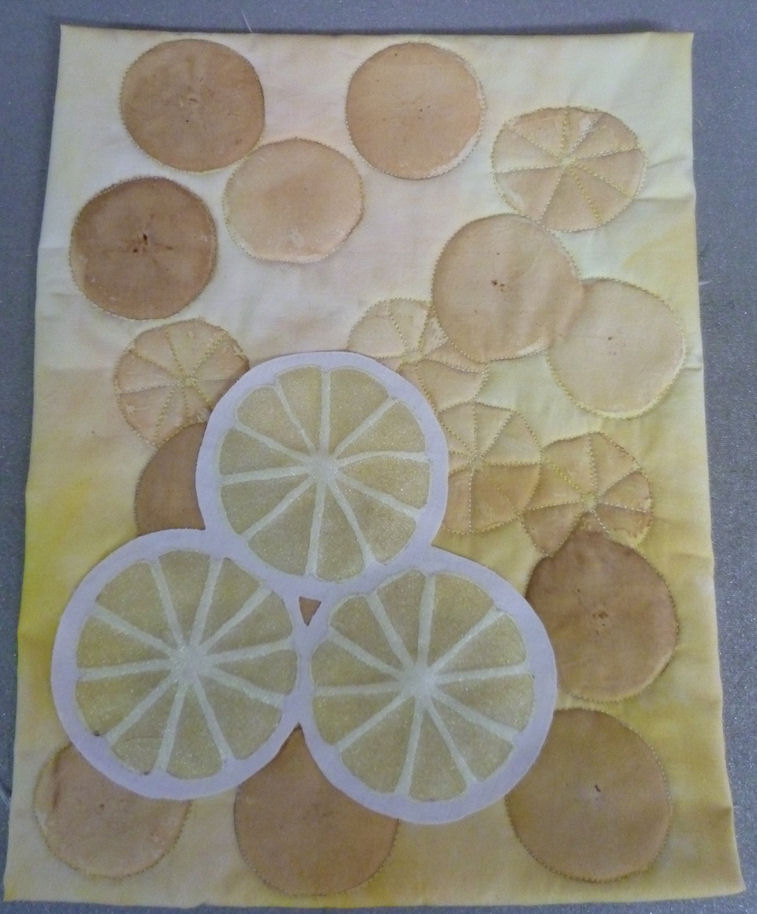
Then I quilted the little sacks of lemon juice in the lemon sections.
and then went round the edges of the pith with a zigzag stitch to give a glimpse of the peel.

At this point I had a think about the rest. I had thought that might be enough, but it was a bit puckery and since I haven't done intense quilting for a while, I indulged myself with fine wee circles. I think it worked well because it adds another scale of circles. Large lemon slice circles, lemon print circles, and then the wee small quilted circles.

Next I trimmed it - I wanted to crop some of the lemon print circles to keep a sense of movement out of the frame.

I did a satin stitch round the edge with a golden yellow colour that was near the golden brown of the lemon prints. I think this kept the background in the background and didn't take away from the lemon slices on top.
I have taken another photo with a different camera setting. Much more like the glow of the actual piece.

I have pinned it to M'Lady and am enjoying looking at it! My kitchen is yellow, so I think it will find its way in there soon rather than waiting to the end of the year! (This is July's journal quilt. Well it has been in my head from before then, I have just needed to have a clear life to do it!)
Edit: I have linked this post to Off The Wall Friday at Nina-Marie's blog - encouraging active creativity.
12 comments:
When I first saw this, I thought it was a poster...I had no idea it was a QUILT!! Holy Cow! What an incredible job (and I'm not normally a quilt fan!)
Thanks Meigan! That is a wonderful compliment! I don't really consider myself a 'quilter' - more like Textile Artist. anything goes...like baking lemon prints. LOL
Sandy
There is only one word for this, Sandy - delicious. Such an inspired idea to use the organza and silk.
Thanks Celia, I think I need to do a different photo to see if I can get the glowing effect.
Sandy
My mouth was watering just thinking about your lemons! Totally wonderful and incredibly beautiful!
glen
I enjoyed this post! It is wonderful to see the progression of the piece.
ohhh My!! how clever are you! They look so real and I love the quilting too! I really like the use of yellow in all its hues - great job!!!
Thanks for the lovely comments. this is for the Contemporary Quilt Journal Quilt project. this year the first 4 pieces need to be red, the second 4 yellow, and then the last 4 blue. you can use up to %25 of another colour.
I am learning alot about colour hues!
Sandy
Juicy!!
This is absolutely inspired (and inspiring) from start to finish. And a soldering iron. Huh. I would've never thought of that.
Thanks Jeanne,
Ages ago I read the soldering iron idea on a sewing list from a man called Bill Jones who makes costumes for the San Francisco Opera.
If you do it on a baking tray or ceramic tile, you can pull it away and the edges are sealed.
you can do a few layers together and they will seal together and can be treated as one. you need a pretty fine tip and somewhere to park the hot soldering iron when you are not holding it.
Sandy
I think I can taste those lemons. I really enjoyed following the processes you were using and I was glad you returned to some tight quilting. I like to see some of it, even if not on the whole piece, just for the difference in texture that it adds. Love the piece.
Post a Comment