Showing posts with label sew art. Show all posts

Monday, 12 November 2018

A traveller returns

The piece I did last year for Stretching Art has returned this week.
Sewing Large.
Makes me want to do another version. The first one was called Sew Large. It shows a large eyehand sewing needle.

The next challenge from Stretching Art and Tradition is about the number 20.
"It’s a big milestone for Stretching Art and Tradition. We turn 20! For SAT20, we invite you to explore the number Twenty in any way you can think of. Twenty Dollars buys a meal, twenty stitches to the inch (is there such a thing?), 2’s company, 3’s a crowd, 20 is a party, twenty pieces of fabric. We’re excited to see where you go with this theme."
I have a couple ideas, but probably won't be able to start it for a while.
If you are interested in taking part, let me know and I will connect you with the details about signing up.

Tuesday, 7 November 2017

Sewing Large - Finish

I had left the hand stitching in the area of the needle til after it was on, because I didn't want to fuse the appliqué over any surface thread. The thread being cotton crochet thread.

When I hung the nearly finished piece up to see the overall effect, I realised there was a section in the middle part where the hand stitching left a large pucker.


So, I took out one line of stitching and added some on a few different lines of that area. It still puckers some in this image, but I thought it might press out. And it did.

I did a bit of stitching on lines in a few other places to make it look like an overall fabric pattern design. (ish).

So, I got on with the trimming to size and the binding.

And here we are:
26inH x 18inW
Sewing Large

Very good feeling to finish this. It isn't due til February! HA. 😎
But I want to get on with another big project due before that. And this means it won't be hanging over my head throughout the holidays.

I just have to remember to post it off with sufficient time that I don't have to fret about it arriving on time!😰

Monday, 6 November 2017

Sewing Large

So, to replicate the needle -


traced onto adhesive web. I used the Bondaweb (I think it is called Wonder Under in America.) because it has a transfer paper. I know you are meant to be able to do this with Misty Fuse, but when I fuse it to baking parchment, it changes the thickness of the web when the little web strands melt together.

So, I trace the needle and its lines - the places where highlights or shadows are defined - onto the fusible web with transfer paper still attached. Then I fuse it onto a mottled fabric...I have a hand dyed piece that is grey and brown shades and tones. It is fused into an area that has a general colour look as  what I am going for.

Then I cut out around the outer line. Because the back side is where the fusible is, I use something somewhat sharp, (like my quick-unpick/seam ripper) and run it over the traced lines. It gives a slightly raised effect on the right side of the fabric. Using that as a guide, I use pigment ink felt tip for the shadows and white gel pen for the highlights. I just keep using the guide and trying to copy the image. The lower part of the needle on the right.
Oh and later, I did realise I was meant to mirror the image. It didn't line up properly with the top part. Oh. Being small and not too different from side to side, I was able to colour in some white and lighten some black.

When that was done, I placed the enlarged image on the quilt where I wanted the needle to go. I didn't want the space between to mess with the way the needle would look altogether.
I still wanted it to look like it was pushed into and out of the fabric.

Next, I fused it in place and spent more time drawing into the appliqué to make it realistic.
I used a pencil to draw the shadows onto the fabric of the quilt. Initially I had included the shadow on fabric part of my image in the appliqué, but I remembered that the realistic look of the first one I did had the shadow drawn onto the work. It made it, then, the colour of a shadow on the white as if it were a large needle pushed through the fabric. Not the colour of the shadow on the image, which was not very true after all the enlarging of the photo.

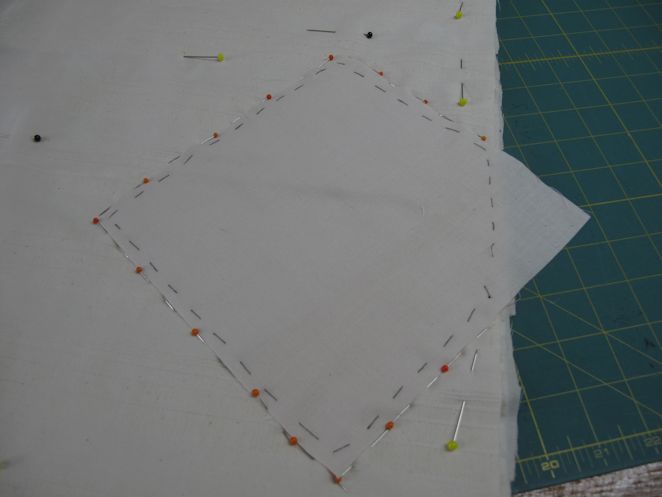
I didn't want to trust the fusing alone to keep the needle on there through packing and unpacking of exhibition touring. But I didn't want to alter the look by any machine stitching. So, I used black quilting thread and did a hand-pick stitch. (which is a bit like a tiny back stitch.) and the small stitches don't show unless your nose it right on top!

Next, A bit of adjusting of the hand stitching and pressing before trimming and binding.

Saturday, 4 November 2017

Sewing Large

The 'new' quilt...
well I left you in limbo. I  have been working on it!

  I have been trying to do this 'pacing' thing that the physio and pain management team talk about. You think you are doing it, and then you find actually, you are trying to keep going regardless...again. The physio is helping alot! But now it is down to me to do the homework.
So, when I start realising I am beginning to twist around to stop my back hurting so much, I realise,  'Oh. My back is hurting.'  This may seem obvious. But when you have been trying to ignore pain for years because you have been told rub something like Deep Heat on it - or - there is nothing they can do about it - or - it is part of fibromyalgia...well.  You have to relearn to listen to the messages about the pain.
All that to say, I have been trying to stop and do something like reading and in a different chair. And when I start reading. I am gripped. Not much getting back on the computer!

So, enough moaning. 😐

**********************************

One change I made on the patches for the Sewing Large piece was to pink the edges.
It is not only neater, but actually gives a bit more interest to the whole than a straight edge. This was a little surprise. I like it!

Next step: the needle
Back when I made the first in this series, I took photos of different needles. Then I enlarged them bigger and bigger.
This is a print out of the enlarged needle I am going to try to reproduce for this work. (print out laying on the quilt).


More next week.

Thursday, 26 October 2017

and quilting the new one

So, having solved the issues of sewing from the back for the squares, I realised it would not be easy to do the next step.

The background which the squares are stitched onto, have tone on tone stripes - damask-like. I wanted to stitch with large thread across them. BUT. To do that from the back would be more than my head could manage.
Also, my back is limiting the intricate stuff, even if I sit in my sewing chair for any length of time. My physio is helping me work on that, but at the moment. no.

But. I can sit in the chair in the lounge and stitch without my back hurting. I decided to hand stitch with my chosen threads across the lines of the stripes. And then realised I haven't actually did hand work on a piece like this. Well,  yes the red x's for the 70,273 project. So, for the stretching part, I would have the bobbinwork as well as hand quilted with big stitch.
Voila!

I have left some space in the centre to put the enlarged needle. I will do that before I finish the rest of the lines. I hope you can click on the photo to see the stitching. I didn't stitch all the lines, only selected ones.
I used variegated yellow and white crochet cotton and a variegated yellow, orange, blue, green (the same I used for the squares.)
So the needle is next.

Wednesday, 25 October 2017

more on the new one

So, bobbinwork.
This is not so hard - other than the technical aspect of working out how your machine can do it - when you are working from the back and following a design there. Sometimes stitching through something like paper or soluble film or fabric that has the design drawn on it.

But, what I wanted to do was stitch squares onto the front using bobbinwork.
ok.

I first tacked them on, this would at least hold the squares in the right place. But as my tacking wasn't exactly parallel from the edge of the square, I was concerned that my stitching would be randomly all over the place.
So, I also pinned at the outside edge of each square. I would be going slow anyway and if the edge of the foot travelled along using the pins as a guide, I shouldn't have much problem with catching pins in the footplate.
And it worked! There was one or two pins I realise had pulled out, so I stopped and rescued them. No big issues.
The one thing which was difficult was getting a 45° corner on the stitching. It had pulled the smaller thread creating 'eyelashes' as it does when you turn corners too quickly when doing free machine embroidery. But there was enough in the large thread tail from the start and end to pull it along and adjust the small thread to make the tension right.

On the front, the stitching is parallel with the edge of the square. and when taking the pins and tacking out, the square looks stitched on with big thread (crochet cotton) that doesn't go through the needle!
The reason I want it to look like big stitching is because I am going to do an enlarged needle like on the first one.

Friday, 20 October 2017

The new one

So, moving on from the sampling, I laid out the top fabric, the batting, and the bottom fabric. Plus a couple scraps still on the table from trimming the 3 secret pieces.

To do bobbin stitch around the scraps, I will have to work from the back. In order to tell where those scraps are, I need to have some sort of clue on the back!

So, I did some tacking round them. Also pinning the layers together so they will all work together when I am turning upside down.
Actually, I like the look of the tacking stitches! Maybe those will be a part of the work some how? Thinking about it.
We have Harvest this weekend, so being busy!

Thursday, 19 October 2017

A new starting

Starting on my piece for next year's Stretching Art challenge, called Under Scrutiny.

I am in need of doing something that doesn't take all my energy. So, I thought I would do another Sew Large piece like this one.
H46in x W31in (117cm x 79cm)
I used slivers of fabric to recreate the image of the needle.
“Sew Large” - A closer look at one of the tools of my trade.
A simple hand embroidery needle stuck into a piece of cotton
covered with additional trial samples of cloth.
Any number of these can be found here and there around my studio.

The Stretching Art piece needs to be smaller, and part of the stretching is to try something challenging. So, I thought about using bobbin stitch  - where you work from the back using a larger thread in the bobbin.
Here is a trial (at the top above my order of sequins which came yesterday. Not to be used on this work, just taking one photo for both things!). I adjusted the stitch length and tensions using this thread I already had wound onto a bobbin.

I think it works like I wanted it to. Next step, create the quilt sandwich and figure out where to stitch.

Wednesday, 15 February 2017

Something different

I have been having issues with the computer just stopping where it is and then the Thoughtful Man spends a few hours with a new attempt to coax it to carry on. So, a quick post while it is working.

I made this for the Thoughtful Man for Valentine's Day. (He is my Knight). He plays piano and a few other instruments.
So, "Music for a Knight".
And an interesting view with the light coming across showing the dimensions of the quilting.

As you can see, I thought I would try the technique I use for the Ramshackle Houses to see how they would work for a different outline. Still trying to give a sketch look, I often draw this knight shape, without the music, in cards for him. So, in this fabric is blends in some, but I think it works.

Thursday, 17 July 2014

Sleeve day

Today I have been putting hanging sleeves onto pieces that need to be sent off hither and yon.

I entered 2 pieces into FOQ "Menina de Favela e Água"
and Sew Large - which I realise I never showed more than detail shots. As it wasn't accepted into the 'Redirecting the Ordinary' exhibition, I am sending it to FOQ.
H46in x W31in (117cm x 79cm)
 
“Sew Large” - A closer look at one of the tools of my trade.
A simple hand embroidery needle stuck into a piece of cotton covered with additional trial samples of cloth.
Any number of these can be found here and there around my studio.

Detail

and will also have 3 of this year's journal quilts there.

I also need to put sleeves on the Illuminated Letters to be sent to America next month. And a sleeve on Drop in a Bucket to be in France by 1 September.

This is a good kind of busy!